

Release date:2021
Author:Kamel Khezri
Skill level:Beginner
Language:English
Exercise files:Yes
Developing Realistic shaders in Arnold for Cinema 4d Vol.01
 Developing Realistic shaders in Arnold for Cinema 4d Vol.01
This is the first volume of a series of courses created at mographplus.com intended to introduce the tools and workflows for creating complex and realistic shaders, utilizing Solid Angle’s Arnold renderer in Cinema 4d.
Developing Realistic shaders in Arnold for Cinema 4d Vol.01
This is the first volume of a series of courses created at mographplus.com intended to introduce the tools and workflows for creating complex and realistic shaders, utilizing Solid Angle’s Arnold renderer in Cinema 4d.
Our goal in this course is not only how to create realistic shaders but before that how to train your eyes to see real-world surfaces and analyze their features, and then recreate those surfaces and shaders in Arnold.
In this first volume will be covering four major shader categories, Plastics, glasses, metals, and fabrics.
For each category, first, we try to familiarize you with the features of that shader type in the real world and then show you how to recreate those features using Arnold shaders and nodes.
We start with plastic,
In the first lesson of this course, we learn how plastics tend to appear in the real world and what features they have, after that we start using Arnold for Cinema 4d to recreate those features.
In the second lesson, we try to recreate a highly-detailed Bowling ball shader and we really go all the way and make it as detailed and realistic as possible.
Next, we create the shader for a vintage shiny dirty plastic phone
Then we start discussing glasses,
In the first lesson of this section, after understanding the physical features of glasses, we try to recreate a different type of glasses in their bare minimum form.
In the second lesson, we recreate a smudged glass shader, and it takes time but the result definitely worth the effort.
Then we take a look at creating an extreme example which is going to be a dirty rusty colored glass shader, and I promise you there is a lot to learn here.
The next category would be metals.
In the first lesson of this section, as we did with plastic and glass, first we figure out how metals work in the real world and then we create different types of metals.
In the second lesson, we create a detailed scratched vintage silver mug and I show you how to create every little detail in the reference photo.
Next, we create the shader for a bronze cast sculpture and also a few other versions of the same shader to make it more interesting.
After that, you learn how to create antique metal shaders.
In the final lesson of the first volume, we explore fabrics and show you how to realistically create different types of fabrics in Arnold Renderer.
For the majority of the course, we’ll be taking a reference photo and use Arnold for Cinema 4d to recreate that shader, but to be as informative as possible and to not repeat ourselves we might change that rule sometimes.
In the second volume of this course which is planned to be released in the near future, we plan to cover, wood shaders, translucent shaders like chocolate, jade and marble, leather, plants shader and much more … stay tuned for that.
So there is a lot to learn in this course and if you are trying to take your Arnold knowledge to the next level and learn how to build complex shader networks in Arnold, you are in the right place.
Developing Realistic shaders in Arnold for Cinema 4d Vol.02
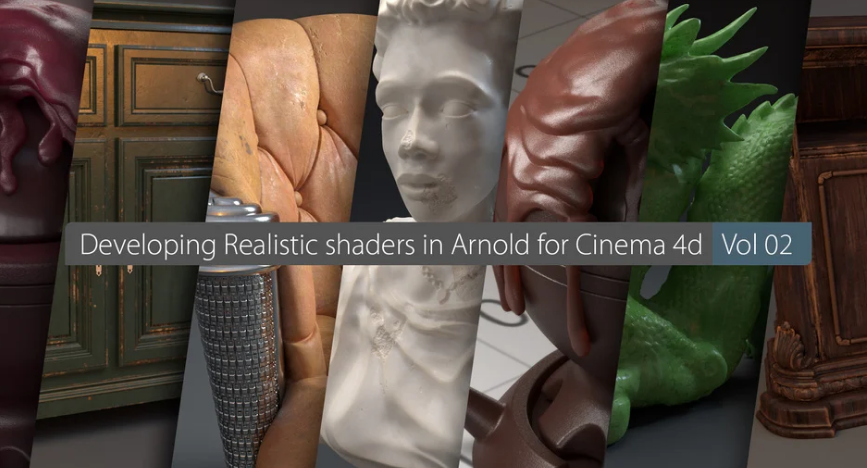 Developing Realistic shaders in Arnold for Cinema 4d Vol .02
This is the Second volume of a series of courses created at mographplus.com intended to introduce the tools and workflows for creating complex and realistic shaders, utilizing Solid Angle’s Arnold renderer in Cinema 4d.
Developing Realistic shaders in Arnold for Cinema 4d Vol .02
This is the Second volume of a series of courses created at mographplus.com intended to introduce the tools and workflows for creating complex and realistic shaders, utilizing Solid Angle’s Arnold renderer in Cinema 4d.
Our goal in this course is not only how to create realistic shaders but before that how to train your eyes to see real-world surfaces and analyze their features, and then recreate those surfaces and shaders in Arnold.
In the second volume will be covering three major shader categories, wood, leather, and translucent shaders.
For each category, first, we try to familiarize you with the features of that shader type in the real world and then show you how to recreate those features using Arnold shaders and nodes.
We start with wood shaders.
In the first lesson of this section, after understanding physical features of wood, we try to create a few examples of real-world wood shaders and show you how to add different features to make your shaders as realistic as possible.
In the second lesson, we create a few painted wood examples and show you everything you need to know to make them very detailed and eye-catching.
In the third lesson first you learn how to approach interior lighting in C4DtoA and after we finished lighting the room we start to create different types of parquet shaders and hardwood flooring.
The next category would be leathers.
In the first lesson of this section, first, we figure out how leather appears in the real world and then we show you the basic approach to create different types of leather shaders.
In the second lesson, we create a detailed vintage leather Shader and show you how to replicate every little detail in the reference photo.
The next chapter will be dedicated to translucent shaders.
We start with a translucent marble sculpture and after understanding the physical features of such shaders we start working based on our reference photo and at the end, we are going to have a few amazing shaders that are going to look extremely realistic.
In the next lesson we work on a realistic jade shader and I guess it should be really fun.
And in the final lesson we work on a very difficult assignment, we try to create a realistic chocolate shader and as we will be using alsurface shader from alshaders, first we go through this particular shader and show you how it works, after that we focus on creating a few types of chocolate shaders using alsurface shader
For the majority of the course, we’ll be taking a reference photo and use Arnold for Cinema 4d to recreate that shader, but to be as informative as possible we might change that rule sometimes.
This is the last volume of developing realistic shaders in Arnold for Cinema 4d and we will be updating this two volume with new video tutorials on a monthly basis.
there is a lot to learn in this course and if you are trying to take your Arnold knowledge to the next level and learn how to build complex shader networks in Arnold, you are in the right place.
Let’s get started.
Vol 01 0101_Introduction 0102_Project_Files 0201_plastic_toy 0202_bowling_ball 0203_plastic_phone 0301_basic_glass_examples 0302_smudged_glass 0303_dirty_glass 0401_metal_basic_examples 0402_metal_scratched_silver 0403_bronze_sculpture 0404_antique_silver 0501_fabric_basic_examples
Vol 02 0102_project_files 0201_wood_tv_stand 0202_painted_wood 0203_wood_parquet_and_interior_lighting 0301_leather_simple 0302_leather_french_club_chair 0401_translucent_marble_sculpture 0402_translucent_jade 0403_translucent_chocolate
 Channel and Group
1、登录后,打赏30元成为VIP会员,全站资源免费获取!
2、资源默认为百度网盘链接,请用浏览器打开输入提取码不要有多余空格,如无法获取 请联系微信 yunqiaonet 补发。
3、分卷压缩包资源 需全部下载后解压第一个压缩包即可,下载过程不要强制中断 建议用winrar解压或360解压缩软件解压!
4、云桥网络平台所发布资源仅供用户自学自用,用户需以学习为目的,按需下载,严禁批量采集搬运共享资源等行为,望知悉!!!
5、云桥网络-CG数字艺术学习与资源分享平台,感谢您的赞赏与支持!平台所收取打赏费用仅作为平台服务器租赁及人员维护资金 费用不为素材本身费用,望理解知悉!

评论(0)